Internal beta test
It is an honour for us to invite Filipp, Wanjian, Manuel, Zhenzhu, Zhuanglin, Qingda, Zhenyang, Guoqiang, Zhiwei, Ivan to join our internal beta test.
Thank you all in advance for your time and effort to help us improve SpinView before it is released.
Here we provide step-by-step instructions for installing guide SpinView (internal-beta version).
1. Installing SpinView with conda virtual environment.
-
To install
minicondaplease follow the instructions here. -
To install
Anacondaplease follow the instructions here.
You can choose one of the above two options to install conda.
2. Create a new conda environment for SpinView using the following command:
$ conda create -n spinview python=3.9

Proceed ([y]/n)?     y
---> 100%
Successfully created conda environment for SpinView
3. Go to the path that have spinview-1.0.0-py3-none-any.whl file and install SpinView spinview-1.0.0-py3-none-any.whl file using the following command:
$ pip install ./spinview-1.0.0-py3-none-any.whl
---> 100%
Successfully installed spinview
Note that user in China Mainland may need to add a pip source to make sure you can easily download all packages. (add -i https://pypi.tuna.tsinghua.edu.cn/simple)
$ pip install ./spinview-1.0.0-py3-none-any.whl  -i https://pypi.tuna.tsinghua.edu.cn/simple
---> 100%
Successfully installed spinview
4. launch SpinView in simulation folder (sub-folder in the demo) under auto mode using the following command, remember you need to use the conda environment that you created in step 2:
$ conda activate spinview

$ spinview start
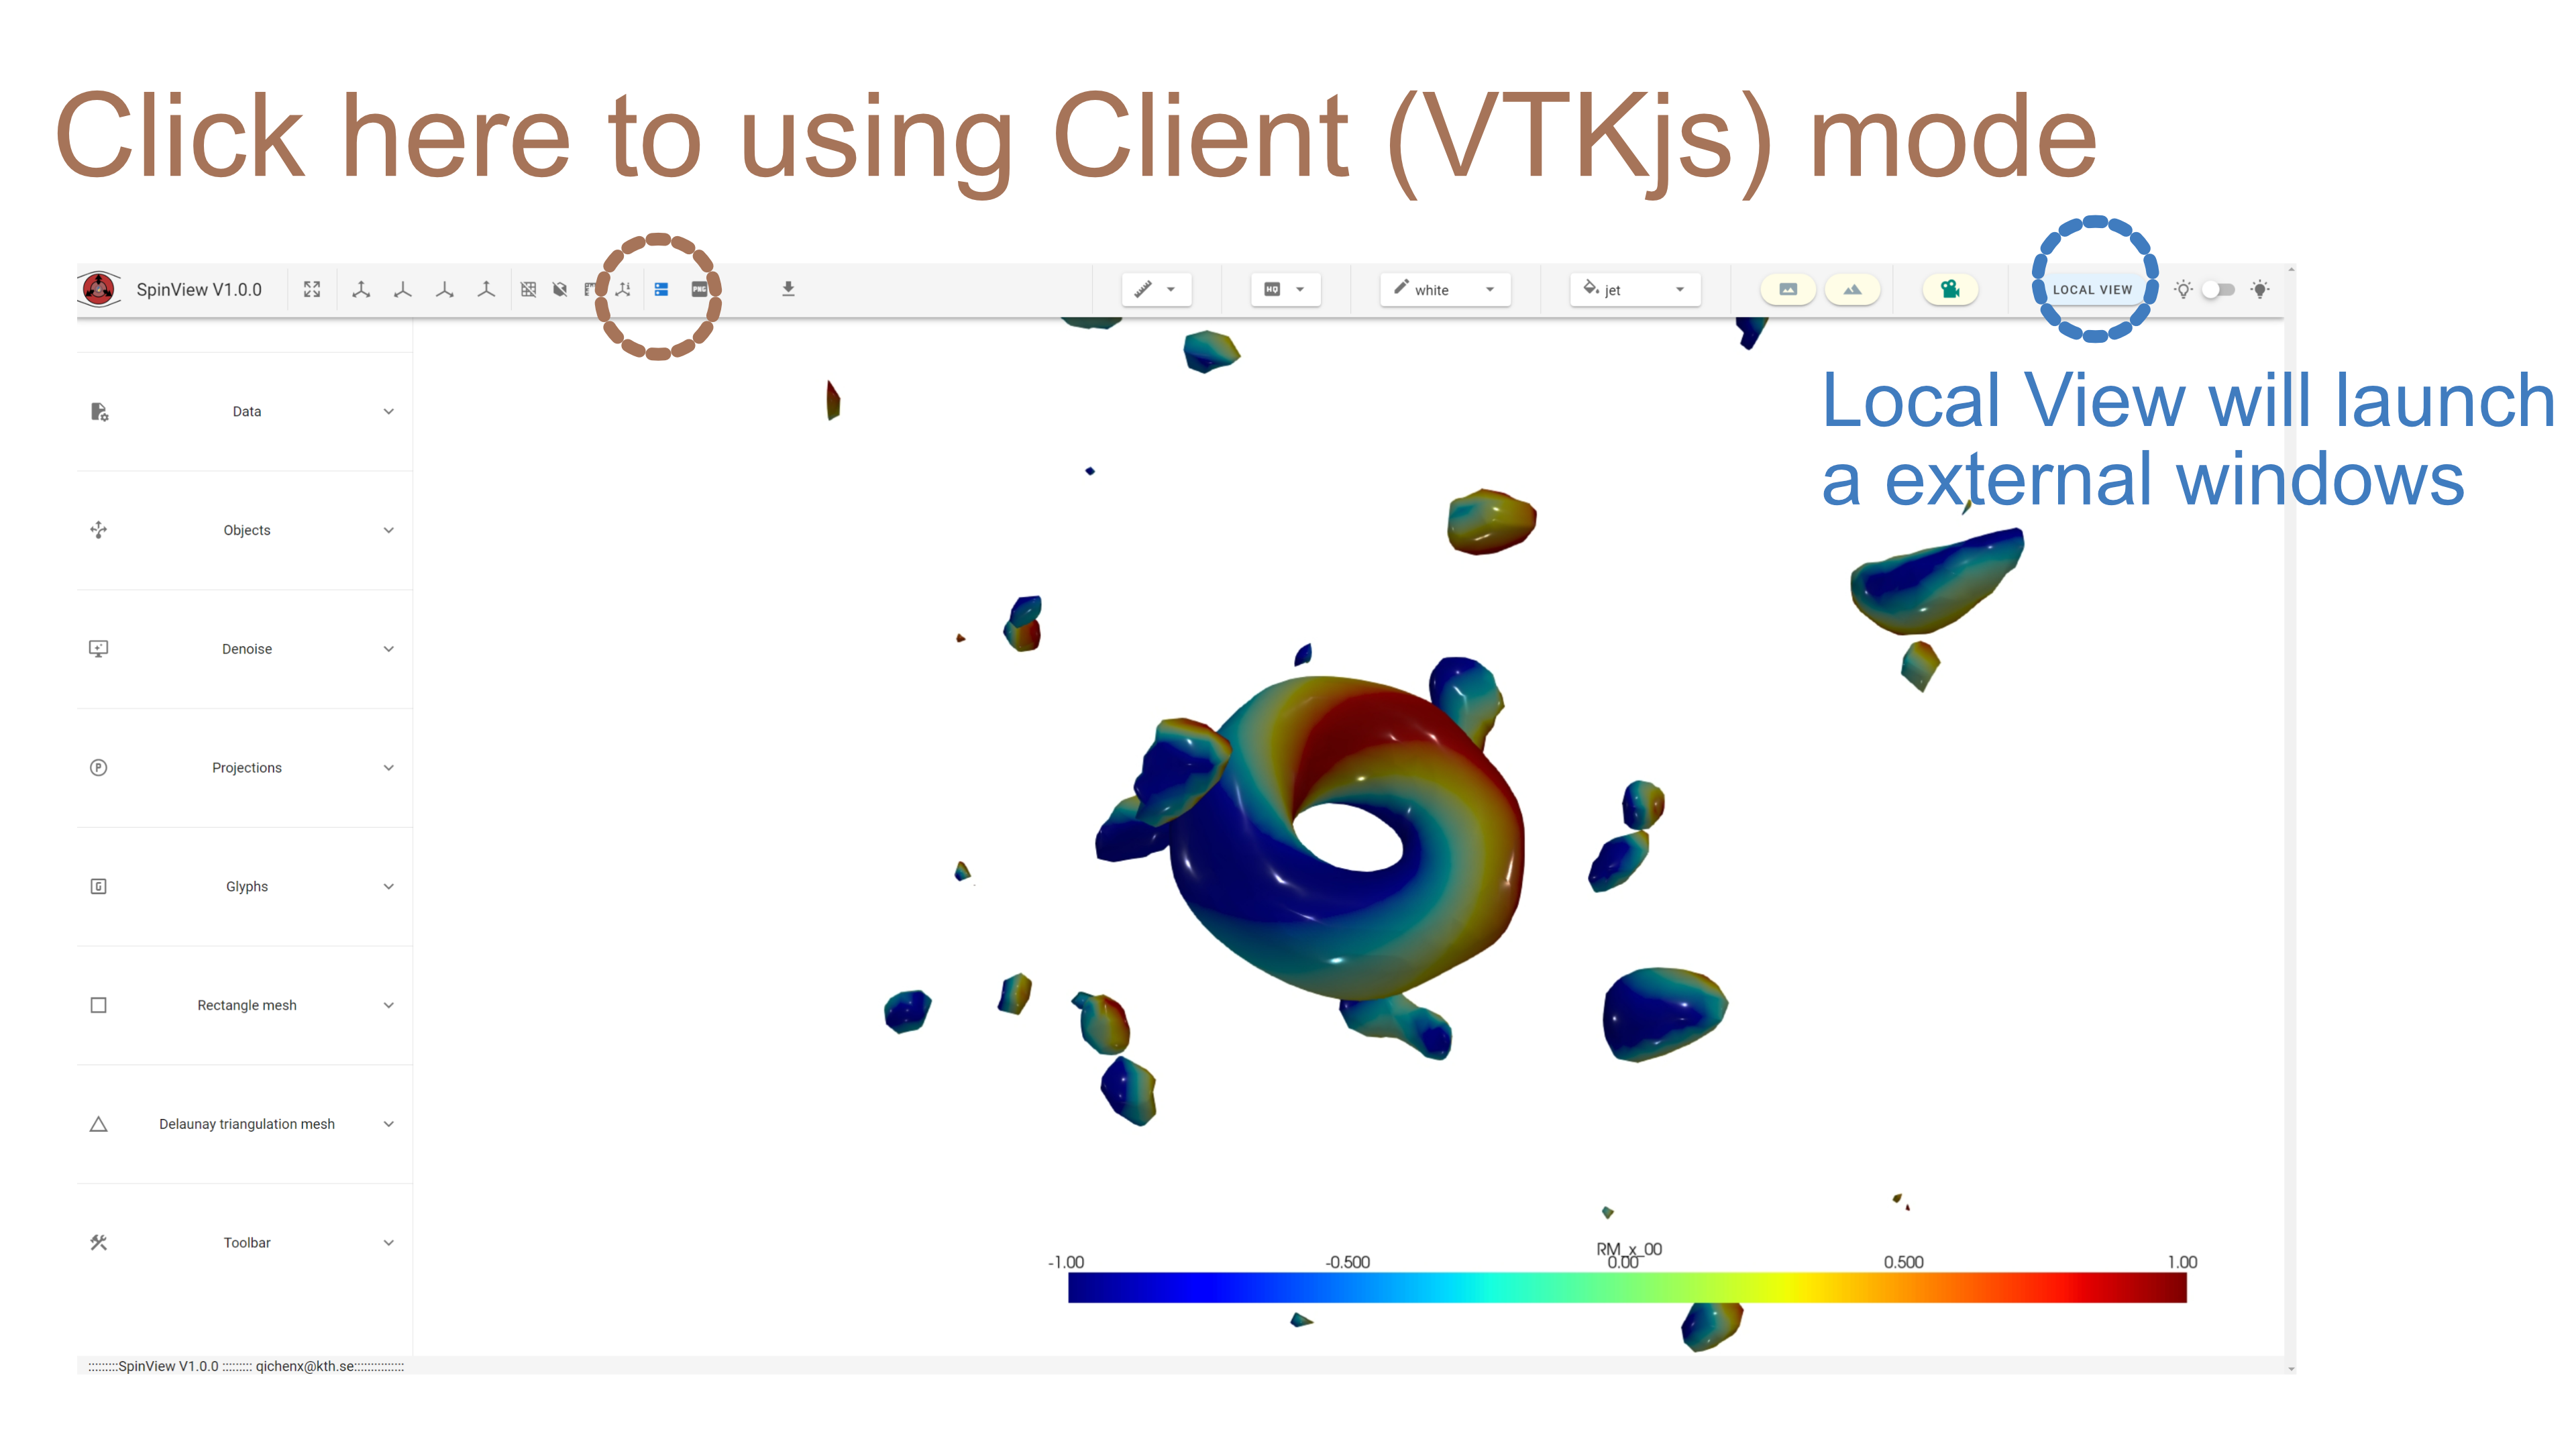
5. You can followed the demo in features or try features with your own data:
Download the demo:
Note:
-
In UppASD demo, one trajectory is includes for 20 frames.
-
In Mumax3 demo, 10 snapshots are included for one trajectory.
-
In Spirit demo, 2 big snapshots(606060), one is hopfion and another is skyrmion tube.
-
In Vampire demo, one trajectory with kagome lattice is include, in this case, rectangle mesh will not work, only trianglazation is needed for isosurface rendering.
Know problem:
- In macos the local view windows can not close or will leave a python icon stay in your docker, see here: https://github.com/pyvista/pyvista/issues/1096, but it will not affect the main window, and the local view mode works properly when open it again. Our current suggestion is just leave the ghost windows there after close the local view windows and go back to the main window. (This problem will not happend in windows system.)